
Introduction
This post is about my improved photo editing using Photoshop Elements. Back in the middle of 2014, I wrote (see Simple Photo Editing – Photoshop Elements) that I had given-in and purchased Photoshop Elements (Elements) to edit my photographs for our Ebooks and the OS Wayfarer website. For me, it was a big decision to buy Elements after using the free Google Picasa (now discontinued) for so long.
I am not a professional photographer, but an enthusiast whose goal is to have quality photos for our eBooks and our OSWayfarer website. Furthermore, this goal guides my other purchasing decisions about photography (e.g. camera equipment and editing software).
The choice was between Photoshop Elements and Adobe Lightroom, back in 2014. However, I chose Elements after reading many reviews. Furthermore, I am not sorry about this decision as Elements has exceeded my expectations. But, I still have much more to learn about it. Also, Elements’ algorithms have saved me on more than one occasion!
I started with version 12 and subsequently purchased Versions 13 and 15. I have not upgraded further, even though the current Version is Elements 2019 following the earlier release of Elements 2018. It is very useful to read reviews of each new version to decide if an upgrade is warranted. Seemingly, a major improvement to Elements only occurs every two-three years.
Recently I re-read that 2014 post and realised how much my approach had changed. My current process is described in this post, which thankfully, has improved considerably over the intervening five years. It includes:
- File management
- My Photo Editing Process
- Using camera raw
- Using expert mode
- Saving edited files
Improved Photo Editing Process
File management
For the purposes of this post, I will consider the task of managing photographs from our trip to Athens. The goal is to prepare these photos for inclusion in our Athens eBook and for posting in an associated album on this website.
Note: I do not use the Elements organiser. Quite simply, I find it just as easy to use Windows File Explorer.
My primary storage location is an external One Terabyte (1TB) Western Digital (WD) My Passport Ultra. Importantly, I regularly backup this drive to a Two TB WD Elements drive. So far it has worked fine. Since the last blog, these drives have been upgraded.
The initial steps involve:
- Copying all the SD card files (RAW format) into a Master Photo folder. For example: Photo Masters > 100D7200-3.
- Copying all the SD Card files (RAW Format) into a Travel folder for sorting. In this instance, I saved the photos by neighbourhood. For example: Travel > 2018 > Photos > Monastiraki. This is the first level of sorting.
- The second level of sorting identifies the Top Picks. A folder is created to store these top picks. For example: Travel > 2018 > Photos > Monastiraki > Top Picks >RAW. These photographs are now ready for processing.
- In anticipation of processing, I also create folders for Photoshop PSD files and JPG files. For example: Travel > 2018 > Photos > Monastiraki > Top Picks >PSD; and Travel > 2018 > Photos > Monastiraki > Top Picks >JPG.
- The PSD files are kept for further processing if required; and the JPG for use in the Ebook and/or Website.
Benefits of this file management approach
This process ensures:
- Masters of every photograph are kept in the Photo Masters folder.
- Additional copies are kept in Travel folder, sorted in sub-folders for processing. Importantly, master files are not touched.
- The Photo Masters and Travel folders are backed up to another external drive.
I think this is an adequate process to protect original photographs. Perhaps I could consider backups of Top Picks in the cloud, but this costs money!
——————————————
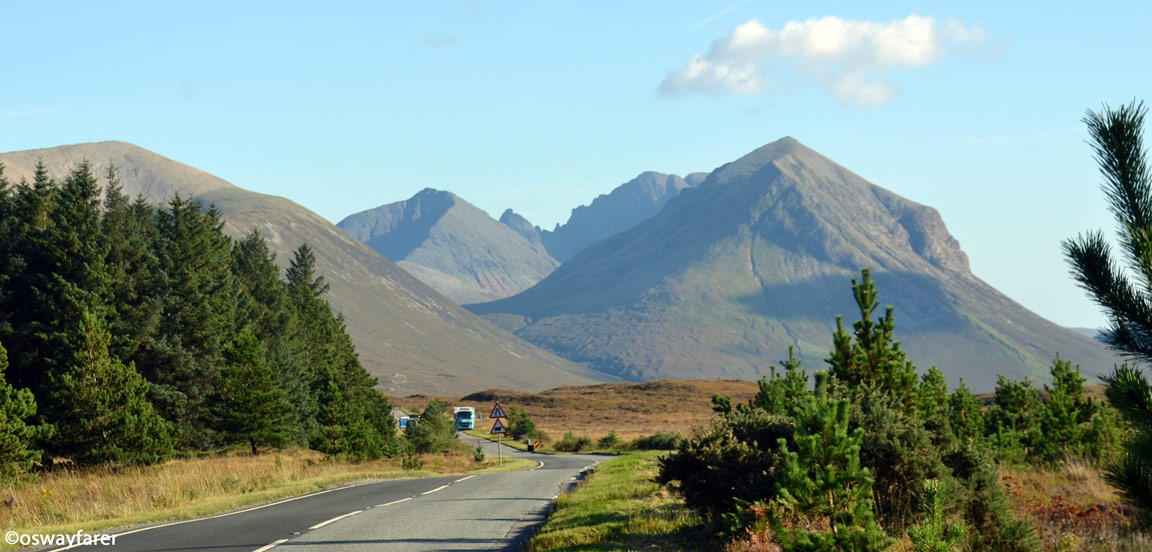
Our eB ook – Five Days on the Isle of Skye can be found on:
Smashwords (EPUB), Smashwords also distributes to Oyster, Scribd, Yuzu, Blio and Inktera (formerly Page Foundry) and reaches OverDrive (world’s largest library ebook platform serving 20,000+ libraries), Baker & Taylor Axis 360, Gardners (Askews & Holts and Browns Books for Students), and Odilo (2,100 public libraries in North America, South America and Europe)
Apple iTunes, Barnes and Noble (Nook), and Kobo.
——————————————
Photoshop Elements
In 2014 I started using Elements in its Quick Mode – so low was my level of knowledge and skills related to photo editing and using Elements. Revealingly, I used Elements’ Quick Mode to process the RAW files because I couldn’t do any better using the Expert Mode. Thankfully, this has changed. So, the big changes involve using Elements’ Camera Raw and Expert Mode to process my photographs.
My knowledge and skill levels have improved as a result of learning to – interpret the histogram, and how to use Elements’ Camera Raw and Expert Mode. This improved situation is a consequence of many hours spent watching YouTube Tutorials.
Camera Raw
- Open the Photoshop Elements – Photo editor
- Open the RAW or JPG file in Camera Raw: File > Open in camera raw… (See Figure 1 below)
- Camera Raw is a great tool for adjusting the image – in terms of its white balance; temperature and tint; exposure, contrast, highlights, shadows, whites and blacks; and the clarity, vibrancy and saturation. These controls are highlighted in Figure 1 by the green ellipse.
- Generally, I’ll only focus on this group of controls in Camera Raw before selecting “Open Image” to move to the main Photoshop Elements program.
- These controls are non-destructive. Individual controls can be returned to zero by moving the tab or double-clicking on the tab. Furthermore, the photograph can be returned to its original state by selecting default.
- There doesn’t appear to be any order of use. However, I generally start with the “Blacks” and “Whites” control to remove overexposure on the blacks and whites as shown on the Histogram “Triangles”. Then I will use the “highlights” and “Shadows” controls to improve the photograph. I’ll adjust other controls as required (e.g. exposure and contrast).
- This is a very subjective process and will vary from photograph to photograph.
-
Camera Raw is a powerful program and it is best learnt by watching some YouTube tutorial videos.
-
For example: www.howtogurus.com focusses on Photoshop Elements.

Expert mode
- Open the image in Photoshop Elements (from within Camera Raw) to continue editing (Open Image – bottom right hand side of Camera Raw Window).
Refer Figure 2 – Photoshop Elements Main Screen for the following steps
- Make a copy of the Background Layer (Ctrl J)
- Correct any Camera Distortions (Filter > Correct Camera Distortions)
- Alternative is to use Image Transform (Image > Transform > Free Transform) (Ctrl T on Anchor Points)
- Crop Image (Image > Crop). To obtain consistent ratios throughout our eBooks and Website I use Photo Ration (Use Photo Ratio).
- Next step is to enhance the photo. I find the Photoshop Elements algorithms are great (better than my creative abilities/interpretations), so I use the Auto adjustments under the Enhance Tab on the main menu (e.g. Auto Smart Fix usually does the trick) (Enhance > Auto Smart Fix). There are others to choose from as well. For example, I have found Auto Levels and Auto Haze Removal useful as well.
- Save the file in Elements format (PSD/PDD) : (File > Save as).
- Also save the file in JPEG format for website and eBook use (File > Save for Web). For our eBooks I target photo ratio dimensions of 1600px * 1067px at 300Kb. Generally, this requires a quality setting between 40 and 60 percent. For our website I target 1152px * 768px and 300Kb. This reduced image size enables a much higher quality setting – near 80%.

Conclusion
My improved photo editing workflow using Photoshop Elements 15 with Camera Raw and the Expert Mode was described in this post. Moving forward, I will concentrate on extending my Elements’ knowledge and skills even further. At nthe moment I do not see any need to look for a more professional program.
References
I just love YouTube for learning about Photoshop Elements. Here are a couple of references:
Photoshop Elements Tutorials – How to Gurus on YouTube
Photoshop Elements Tutorials – Rick Peterson on YouTube
Other articles to read:
My earlier post – Simple Photo Editing with Photoshop Elements.
Other Travel Photography articles.
Our Travel Blog
Views: 553


Leave A Comment